Your cart is currently empty!
Author: jeremy
-

Grow shiso (perilla) all year round in Australia
Shiso / しそ, also known as perilla, is a popular herb in Japan and Korea and known for its unique flavour and health benefits. While traditionally grown in Asia, it is possible to grow shiso year-round in Australia with a little TLC. Here are some tips to help you successfully grow the shiso herb in your Australian (or elsewhere) garden.
Getting started
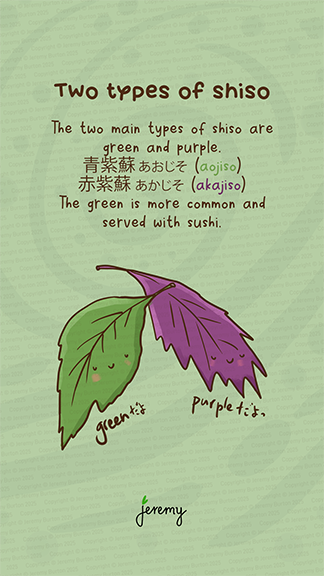
There are different varieties of shiso with the main two being aojiso (or green Shiso) and akajiso (red (aka) but it’s more purple). Its scientific name is Perilla frutescens var. crispa. You’re more likely to come across the green shiso as it’s by the far the most common.
The red shiso has a slightly different and more subtle taste, I’ve found when grown here in Aus. It was a lot stronger in flavour in Japan and used more for pickling and other things. Here are the kanji and wikipedia links for the two varieties:
Sourcing shiso
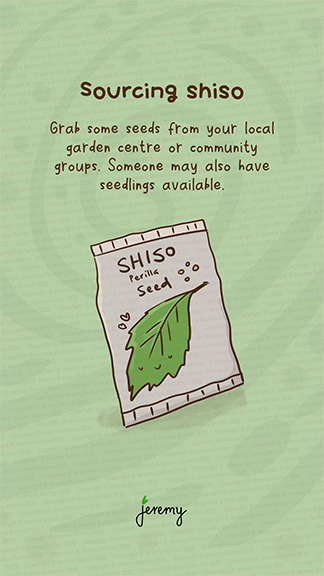
Your local gardening centre may stock some seed packets. Our local one in Perth stocks small packets that seem to be sourced from a Korean supplier. There are a handful of seed suppliers in Australia that also stock the purple when it’s in season. It’s unlikely you’ll find seedlings in your garden centre, it’s just not that popular yet.
Happy Valley Seeds have them online, green and red shiso or try amazon. Check your local Japanese or Korean communities or social pages, there’s likely someone selling small plants for a reasonable price. Do Bunnings sell shiso seeds? No they don’t. I can supply you seeds if you’re in Western Australia.
Germinating shiso seeds
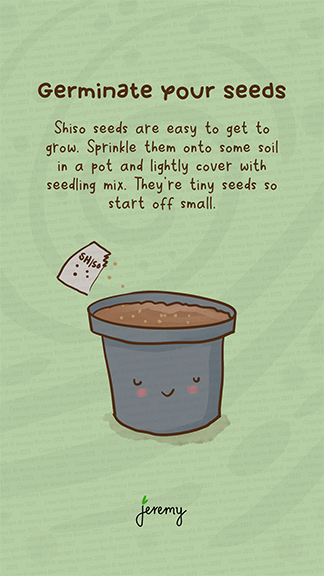
The seeds are tiny, less than a millimetre. Think poppy seed size. They’re quite hardy and long lasting though. I’ve stored some for many years and they germinated fine. Because they’re so small, they just need sprinkling across the top of the soil and a very light cover (if any) with seedling mix.
So them in spring – early summer as they germinate at around 20 degrees C (68 F). They will germinate in around 2-4 weeks. A light soak in water does seem to improve the germination rate, especially if the seeds have been stored for a while.
Watering the seed in will mix them enough with the top layer of soil so that you get a strong germination rate. I’ve found the green shiso germinates so much more consistently than the red. They can be germinated in seedling containers and also on silicone mats in a humid container / room using a light water spray or bath.
Once you get one plant to seed, you’ll have shiso for life. They’re as hardy as basil and if you leave them in the garden you’ll find shiso popping up all over the place.
Let’s talk about shade and light
Shiso plants require plenty of sunlight to grow and thrive. Make sure to plant them in a location that receives at least 6-8 hours of mild sunlight per day. The Australian summer sun is too harsh for these plants without a giving them a little TLC.
If you plan to have them out in the mid-summer sun, they need to be well established (well rooted mature plants), have a constant low level of moisture around the roots (deep pot) and some respite from the afternoon light.
I’ve had shiso survive out in the summer sun using the combination of environmental factors above. Those plants are still surviving today even though they got some crispy leaf edges. They didn’t receive full afternoon sun, I think that saved them.
From my experience, shiso grown under shade (verandah) will produce the best, lush and soft leaves. The harsh aussie sun hardens the leaves up and crisps the edges. They also grow smaller and have less flavour.
If you are growing shiso indoors, consider using grow lights to provide sufficient light for the plants.
Ensure good drainage
Shiso plants prefer well-draining soil to prevent water logging, which can lead to root rot. Add heaps of organic matter such as compost to improve soil drainage. Plant in raised beds or containers with drainage holes to ensure proper drainage.
They have a fine root system and so need a some sand to help with nutrient and water transfer. I found that a thin layer of moisture-holding mulch in the base of the pot or bed really helped make them resilient. So when you plant out, put in some mulch first, soil and mulch again.
Pests
Just like some other herbs, snails and slugs love a bit of shiso. You will likely need some kind of snail repellant. The main enemy however for us in Australia, is the cabbage white butterfly – or its caterpillar larvae. I’ve found that a net is necessary when the butterflies are breeding. It’s the easiest way to keep them away.
Ants also tend to like the sand around the root system.

Harvesting your shiso
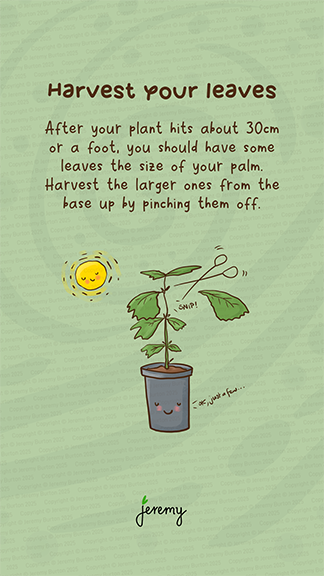
Harvesting needs to be done delicately. Shiso don’t get as woody as basil does and so pulling on the leaves too hard will uproot the plant. I use the method the pickers use in Japan because I don’t need a huge volume, and that is to pinch the leaves off with the thumb and forefinger nail. Scissors also make it easy!
Shiso plants benefit from leaf harvesting. You’ll notice as the plants get taller, the lower leaves will start to brown off and drop. They’re not receiving enough light and will not grow any bigger.
It’s best to regularly harvest from the base up, even if you don’t eat them. Pinch off any larger leaves and it will help reduce disease, provide more air flow and keep pests away.
Drying the leaves
Shiso leaves can be dried in the same way as many herbs. Just put them out to air dry, use the oven or dehydrator. I prefer to air dry them. I’ve tested the oven and even on a very low heat it takes a lot of the flavour away.
Dry them out till crunchy and then smash them up into a sealable jar. Shiso for life. You can sprinkle this into your meat dishes, salads, cocktails, drinks, ice cream – you name it. Think of it as the herb that sits between mint and basil.
Shiso oil
Using a distilling method (check out Shinagawa Distillery’s method. He uses lab equipment to distill flavours and oils from organic matter), you can extract the shiso oil quite easily. A very interesting process and something I want to test out at some point. I’d love to do this for citrus fruits.
Anyway, there is a lot of oil in shiso and it is commercially harvested and sold in bottles for cooking and other things, particularly so in Korea.
Shiso recipes
At this point I haven’t documented any shiso recipes on this blog, but will add them as we go. Try shiso gelato if you get a chance. I mix it with coconut, banana and a little honey, it’s sooo good in summer.
Shichimi – includes shiso
Shichimi is the Japanese word for a common mix of a seven spice used often in Japan.
Shichimi or nana-bro tougarashi is the name for the seven colour chilli mix – 七色唐辛子.
Shiso is one of the seven in the Shichimi mix, and it’s a great mix to try and make yourself if you can grow the set at home.
The other 6 may be (it’s chopped and changed) black and white sesame seed, chilli, ginger, sansho pepper, roasted orange peel, aonori, poppy seed and Kuzu peel. You can grab the S&B Togarashi online, S&B is one of the more popular brands.
Restart the grow process
Your shiso plants will go to seed if you don’t pinch the flower spikes off. So if you maintain the right conditions, white flowers will appear very similar to basil flowers. Let the flower spikes dry out and harvest the seed for planting again!
I’ll keep adding to this as I learn more. Leave a comment and let me know if this has been useful.

Join me on Threads for more or subscribe at the bottom of the page for these posts in your email.
-

Print on Demand (POD) services that I use
If you’re looking for options for print on demand (or produce on demand) and you’re based in Australia, this article may be helpful.
I’m an illustrator and artist based in Western Australia and so I searched for POD (Print on Demand) options locally first. After finding there were no options locally that had Shopify apps, I widened the search to national and overseas vendors.
Update Aug 2025: I’ve migrated off Shopify.
While I work on my physical art, I thought why not setup the illustrations and art prints in the meantime into a gift shop. So here’s what I looked for:
Search criteria:
- A vendor that did it all, great quality (Yeah, there just isn’t one)
- An option for great art prints, ship fast for a reasonable price
- An option for merch, in particular t-shirts, hoodies and tote bags
- Stickers … hmm maybe later
- Sustainable businesses
I looked at some of the Australian (in particular Western Australian) photographers and art print suppliers and how they sell their prints on demand. Some had vendors that made a good canvas mounted print, some had nice art paper. But not many with multiple great options. Although not my main driver at the moment, I really wanted a local sticker producer to have Shopify integration but I couldn’t find one for now.
The integration with Shopify is where I got stuck usually with the vendors. Most don’t have an app or easy way to connect your store. Anyway after much research, here’s the vendors I chose and why, hope it’s helpful:
Art Prints – Printumo
Printumo looked like a good service, run by artists and their product looked quality. They have a limited range of canvas prints only, but they’re great. Other reasons:
- I messaged them and the responses were quick and helpful
- Free setup
- Connects to shopify easily
- Option for Etsy connection
- Ships to many countries
- Mockup images included (some services charge extra – i.e. Printful)
- Shipping centre in Melbourne
Things to look forward to – Etsy, Amazon and eBay integrations are coming within a couple of months.
Art paper has launched (Mar 2025). So Printumo now produce art paper prints as well as canvas. They aren’t available for Australia yet though.
I tested the service and it was very quick and the print and frame are quality.
Clothing – Teemill
The WWF online store uses Teemill so I thought, yeah must be okay! Everything Teemill produces is organic cotton and often it’s remilled material.
I have ordered a sample and but it seems the shipping is on the slightly slower side coming from the UK to Aust. Their policy is 35 days for arrival. When the sample arrives this week I’ll update this post.
Clothing, phone cases & other – Gelato
I checked Gelato out a while back because I really want a quality stationery vendor. They didn’t really have a big range. It seems short, local print runs using a local printer might be the best option for quality stationery rather than POD. Anyone got any suggestions?
But Gelato seems to have good phone cases and the clothing range also looks quality. I’m testing the phone cases and tote bags for now.
- Easy, free setup
- Nice dashboard system (maybe the most advanced)
- Some very cool sleeve, label and other branding options
- Option for Etsy connection
I’m looking forward to testing out some of their products with samples.
Split Shipping
So what happens when people order products from more than one vendor? Well Shopify supports split shipping now. More info in the link.
Summary
Well that’s where I’m up to at the moment with organising print / produce on demand.
Samples are still arriving but so far with the vendors listed here, I’ve had no issues and the system connections seem to be working well.
Have you had a different experience, or do you have a recommendation? Leave a comment if you have thoughts.
Join me on Threads for more or subscribe at the bottom of the page for these posts in your email.
-

How I upcycle plastic milk bottles into pot plants
Have you ever looked at those plastic milk containers and just thought, what a waste? Yeah me too. They’re single use plastic, even though they are recyclable.
Fortunately, there are lots of ways to reuse these. One way I upcycle them is into pots for plants. They’re a great size to get seedlings or small trees started and they have a convenient little handle built in.
Here’s how I upcycle the plastic milk bottles we have in Australia.
Grab your milk bottle
I use the standard 2L milk bottles that are common here in Australia. It’s a good size for planting into.

Cut the top off
I make two cuts using scissors, around the top all the way around. You’re going to make an inverted funnel to plant the seedling into. You can alternatively, just cut the top off and use it that way (just cut the top off and keep the handle).

Open drainage holes
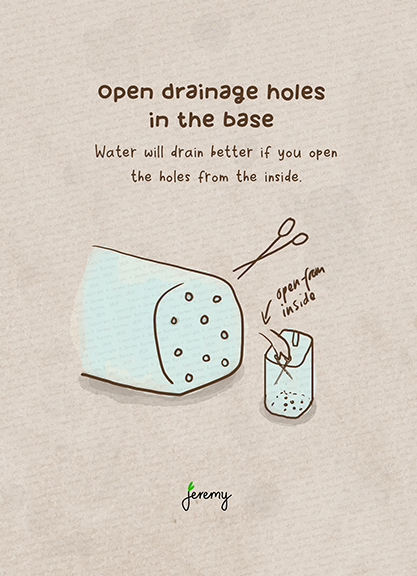
Use scissors or a drill to open drainage holes in the bottom of the bottle. it works better if you push them out from the inside if you’re using scissors, the water will drain better. The holes also provide an escape route for your worms if you add them.
Fill up with soil
Almost fill your milk bottle with potting mix or soil and add a worm or two if you have them. Worms will only eat anything rotting.

Plant your seedling
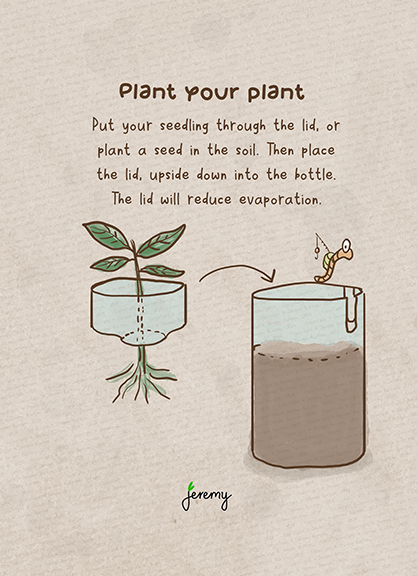
Put your seedling through the upside down lid and plant the roots into the soil by placing the inverted lid into the main bottle. This is a little tricky but you’ll get it!
The upside down lid helps reduce water evaporation.
Place it in the shade
Your seedling will need some time to settle. Give it some care and attention until it’s big enough to plant into the ground or a bigger pot.

You can use this container again even after you plant out your seedling into a bigger pot. Just start all over again.
Nice work!
Leave a comment if you found this useful.
Join me on Threads for more or subscribe at the bottom of the page for these posts in your email.
-

How I stop citrus trees from burning in the sun
Citrus trees can suffer from sunburn. In Australia we have some serious sun and in summer time with no protection, some citrus trees will get burnt. There’s a lot of things we can do to help prevent it. Here are three simple ways to stop the burn and save your trees.
Provide part shade
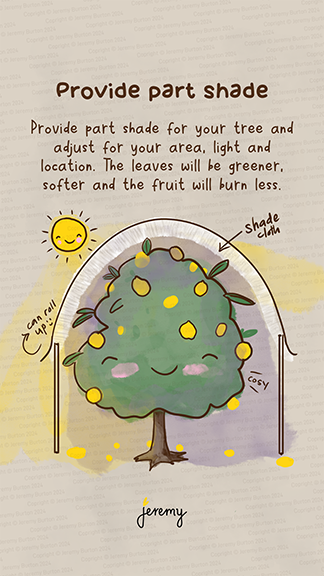
Provide some shade for your tree by putting up some shade cloth. If your tree is in a pot you can move it into a shadier location. For some of my smaller trees, I put shade cloth on one side and it saves them during the major heat of the day.
You’ll find that the leaves will green up, get softer and grow larger in the shade. Adjust the amount of shade for each tree as their requirements are different.
Oh and yeah, this is great for some fruit too. I’ve found our lemons don’t burn as badly with a little shade.
Paint the trunk white
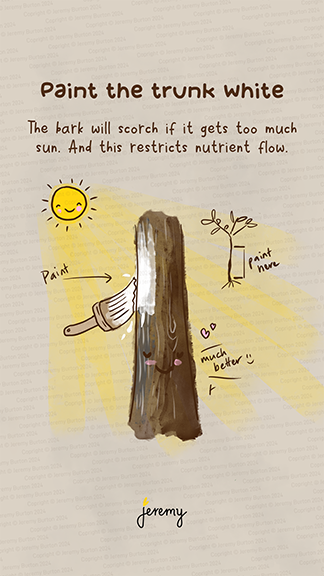
Grab some paint that will last (water-based latex paint) or find tree trunk paint at your local home hardware centre. Some people mix it with white acrylic paint.
Paint the bottom two thirds or wherever you see sunburn. You’ll see the bark turning brown and eventually dying off if it’s getting burnt.
It’s like sunscreen for trees!
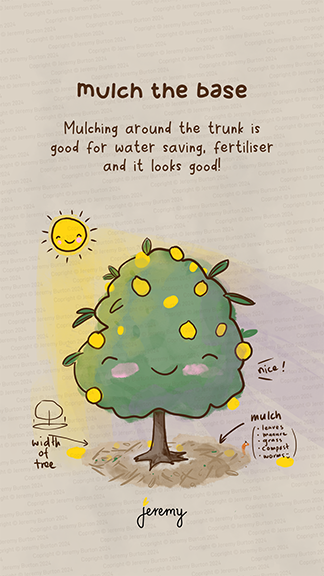
Mulch around the tree
Mulching a few inches around the base is a great way to save water, keep the citrus tree roots moist for longer and trap some of the heat into the soil.
Mulch the width of the tree.
Other ways to prevent burn
Water your trees before hot days. The night before is good so they’ve had adequate time to soak up the water.
Burlap barriers. These can be used instead or as well as the white paint method. However be mindful to keep checking where it comes into contact with the tree bark and no rot is forming.
Put geofabric around the base. I wasn’t a fan of this tbh, but I tested it and it’s worked well in smaller pots to reduce evaporation.
Reflective heat off building or other surfaces. I have a corner of the garden where three trees sit in an area with three light coloured walls around them. There’s quite a bit of radiant light and heat coming off the walls and the trees struggle.
I think I’ll be moving them soon.
Don’t prune during the heat of summer. It opens up wounds which enable water loss through evaporation. I’ve had trees die on me because I cut branches off during summer.
I hope these help, leave a comment if you give these a try.
Join me on Threads for more or subscribe at the bottom of the page for these posts in your email.
